16.2 The Material Tab
The Material Viewer gives an overview of the different materials (or parts) in the model. It can be accessed by selecting the “Materials” tab.
All the materials in the model are listed in the large window on the left. A material can be selected by clicking on the entry in the list. Multiple materials can be selected by holding down the shift button or the ctrl button.
The name of the material can be modified by first selecting it, and then editing the name field, which is located in the center of the material viewer. The enable button, next to the name field, can be used to toggle the state of the material. When a material is disabled, the corresponding part will not be evaluated when visualizing the model data. In that case, it will display with the material colors as defined in the Material Viewer. When enabled, the part will be evaluated, and will be colored according to the local node or element values. See Chapter 6 for more details on this process. The visible button, next to the enable button, can be used to toggle the visibility of the corresponding part in the Graphics View.
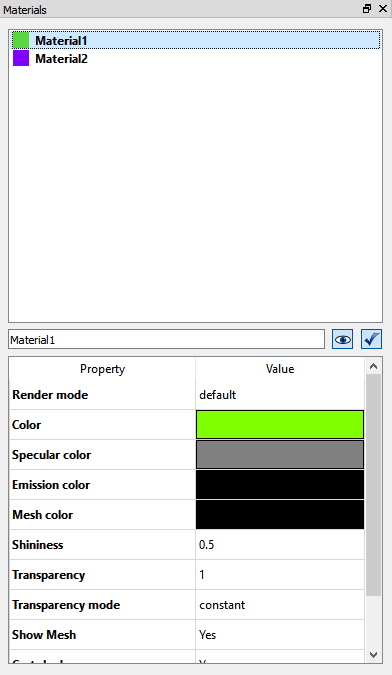 When a material is selected, the property window on the bottom of the material viewer lists the available properties that the user can change.
To edit the appearance of the material, click the colored sphere to open the Appearance Editor. This allows users to set various settings that affect the visual appearance of the material.
Additionally, users can set the following properties:
-
Render Mode: Allows users to override the default render mode and choose between solid and wireframe.
-
Opacity: sets the opaqueness value for the material. Slide the bar to change the value.
-
Opacity Mode: Chooses between different transparency options
-
Show Mesh: if checked, the mesh lines will be drawn on top of the model (when mesh lines are visible).
-
Mesh color: sets the color of the mesh lines
-
Clip: allows the material to be clipped when a clip plane is defined for the model.